
Wednesday, July 30, 2014
Missing Pictures
When I logged on today, I found that all of my pictures had disappeared. I have redone the pictures in most of my posts. I couldn't find my pictures for a couple of posts so they are no longer available. If I find the photos, I will add them. I'm not sure why the photos decided to do a vanishing act, but I realize that I am not the only one.
Tuesday, June 10, 2014
AER Conference Presentation
In April, I presented a workshop at the AER Conference in Virginia. I am sharing some of the slides from my part of the presentation.

Many of my students have Cortical Visual Impairment (CVI). I love the blank books from www.barebooks.com. The shiny red paper comes on a roll from the Dollar Tree. I got 11 - 12 pages from each roll. I used double sided adhesive paper on the back.


Story bags are available from APH. I like to use them to keep a student's Dots for Tots materials from the Braille Institute. You can also use them to keep together a student's objects for a calendar or a favorite book.

Feel and Peel Carousel of Textures has to be one of my favorite products from APH. This picture is a binder that I created so that students with CVI had their favorite background when making choices.

The Carousel of Textures makes a nice addition to the Rolling Right Along Construction Kit. I also enjoy letting students use textured cutout to make repeated line books.

They Symbols and Meaning Kit is a newer product from APH. I like using the plastic pages to make books for students.

Using the iPad with Students with Visual Impairments
This has been a very busy year. I have been working with a student who needs to learn finger isolation skills and using a light touch. I went to the Virginia AER Conference this year in April. I went to a session on using overlays with the iPad. The session talked about using the overlays with reading and writing programs. I came up with the idea to use an overlay to encourage my student to use a light touch and practice finger isolation skills.
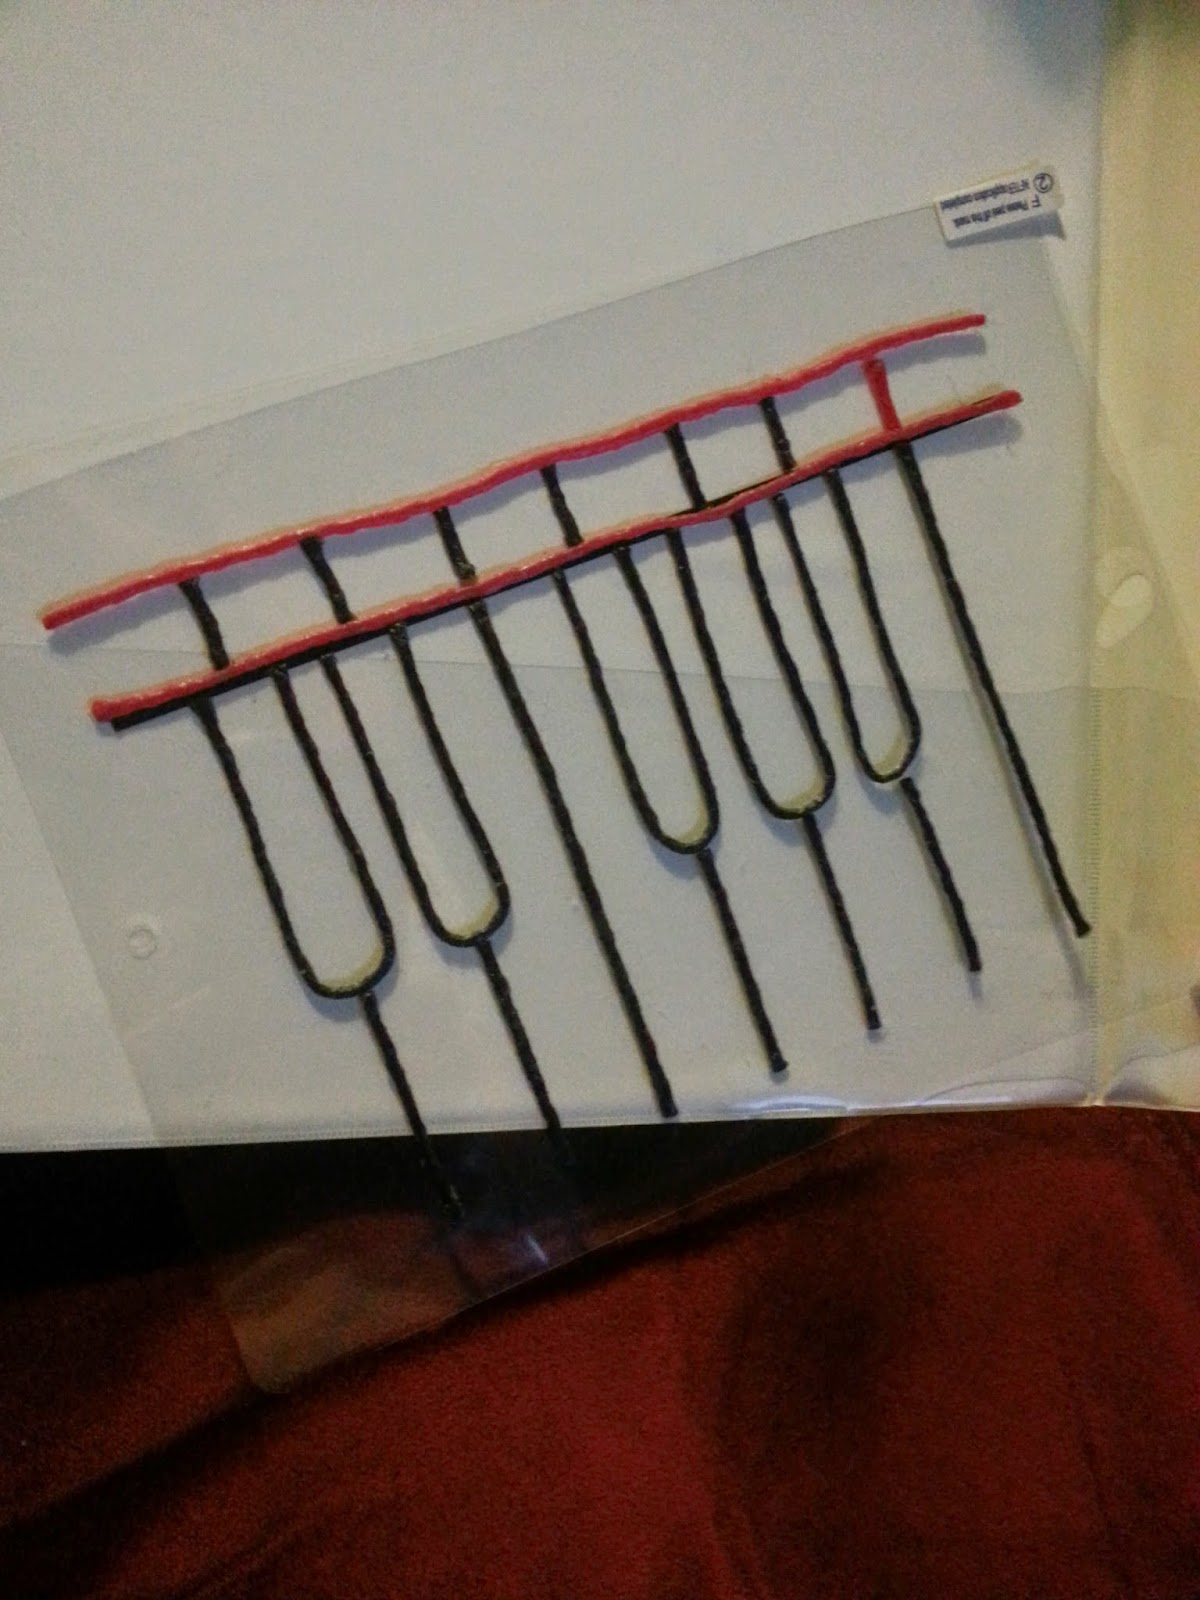
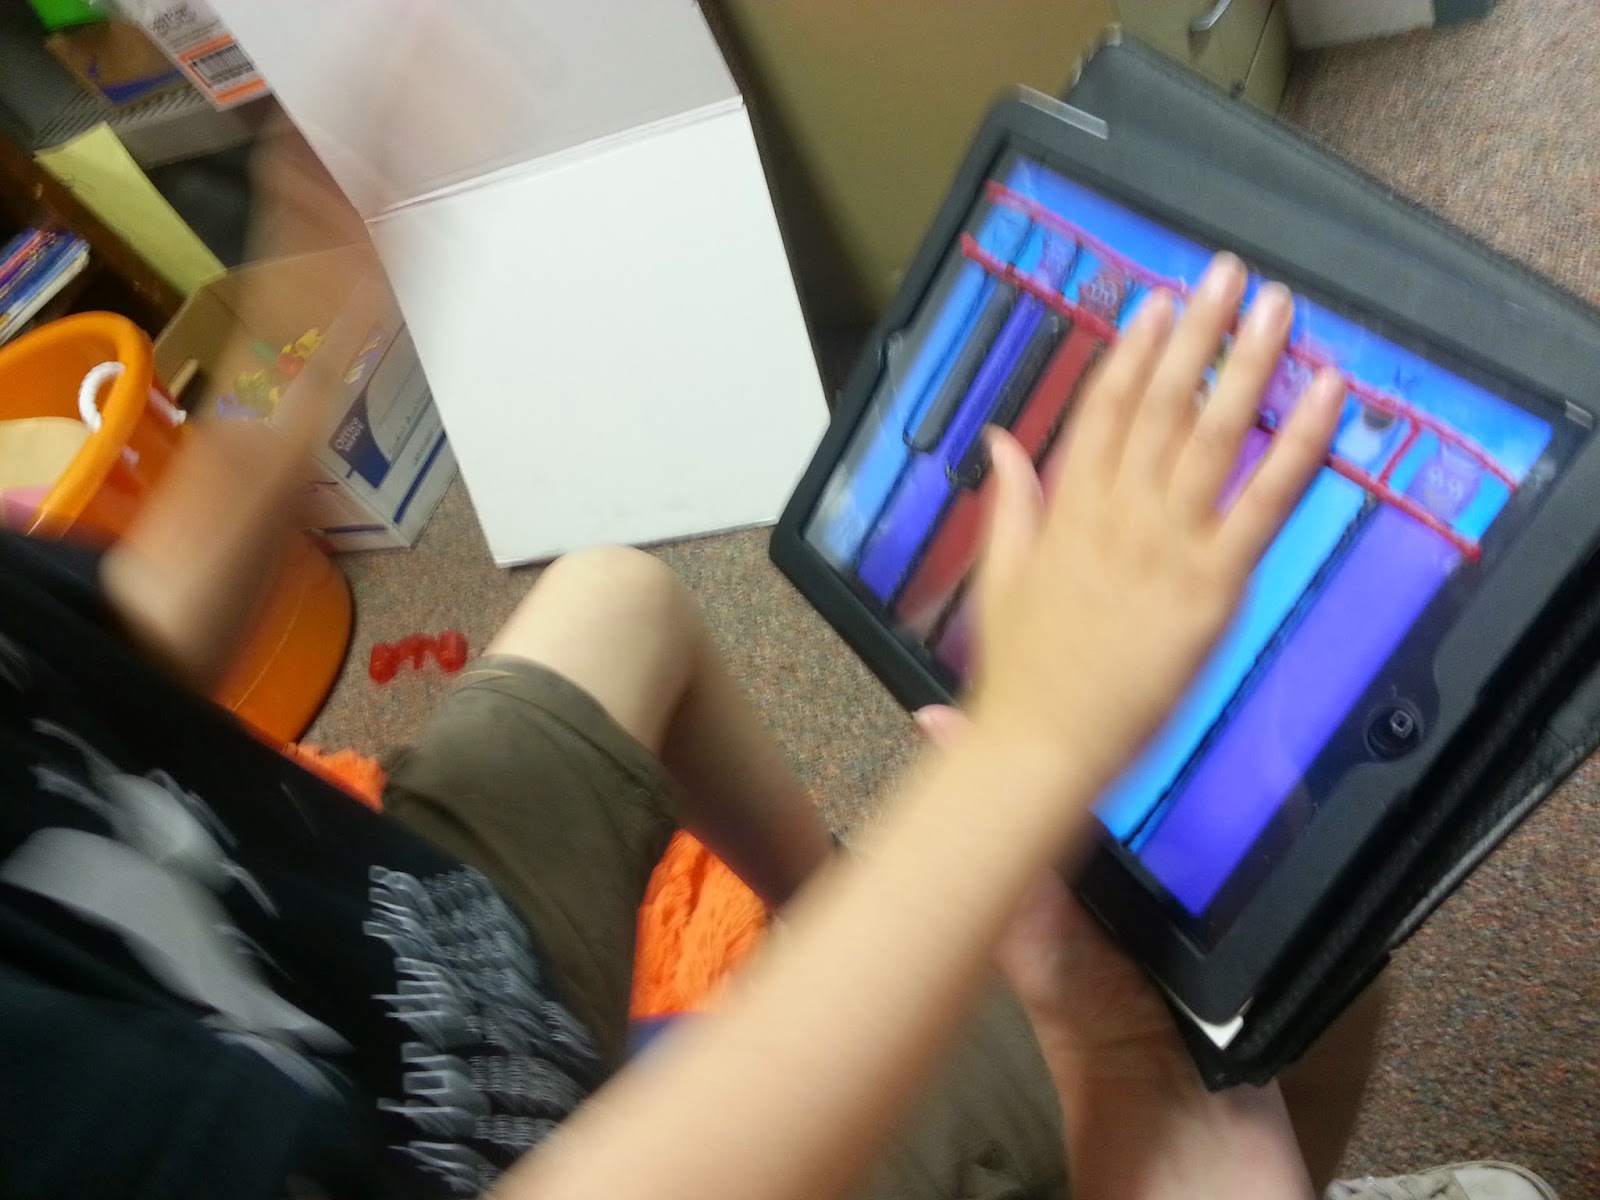
My student enjoys music so I pulled up a piano app and designed an overlay. I purchased the protective cover at the Dollar Tree. I left the cover intact and used Wiki Sticks to create the design. You could use puffy paint or hot glue. I wouldn't suggest using the hot glue while the overlay is on the iPad.

I use my personal iPad with my students. It has the a cover with a magnetic keyboard. I slid the overlay between the case and the iPad. Store the overlays in a binder using page protectors.

My student enjoys music so I pulled up a piano app and designed an overlay. I purchased the protective cover at the Dollar Tree. I left the cover intact and used Wiki Sticks to create the design. You could use puffy paint or hot glue. I wouldn't suggest using the hot glue while the overlay is on the iPad.
I use my personal iPad with my students. It has the a cover with a magnetic keyboard. I slid the overlay between the case and the iPad. Store the overlays in a binder using page protectors.
I look forward to making a few more to use with my students.
Wednesday, May 22, 2013
Spaghetti Textured Painting
One of the classes I work with was learning about Italy. I combined spaghetti and the Italian flag. Here is what we did.
Directions:
Cook the spaghetti the night before. Add a little oil to keep it from sticking. Refrigerate overnight. I read The Longest Noodle before doing the activity. Have the kids put a handful of spaghetti into two baggies (2 handfuls total). Add one color of paint per bag. Shake the bag to mix the paint and pasta. Add more paint if necessary. Put an 11 by 17 piece of heavy paper into the bottom of paper box top. Shake the box top or use utensils to move the spaghetti around. Dump the excess spaghetti into the trash. Some may stay attached but that is okay. It adds texture to the finished product. You could also add glitter to the paint. Glow in the dark paint might be fun too.


Wax Paper Stained Glass for the Light Box
I have a few students who benefit from light box activities. This activity can be created on the light box. After it dries, it can be used with the light box.


Directions:
Draw a simple shape onto a piece of wax paper with a black permanent marker. If the student can rip tissue paper, have him rip the paper into small pieces. You can do this in advance and cut the paper into small squares. Spread enough glue to cover the shape. Place the tissue paper pieces onto the shape. It doesn't matter if you go over the edges because the shape will be cut out with scissors. When the shape is completely covered with a single layer, cover the paper with glue. I used thin lines because when you press the project together, the glue will spread. Place another piece of wax paper on top of the glue. Smooth the paper. Allow the project to dry over night. Cut out the project.
Here is a picture of the butterfly that I did with one group. I also made an earth. The outlines can be changed to match the curriculum. (pyramid-Egypt, shapes-math, etc.)
Background Binder
Many students benefit from different backgrounds when presenting choices. I created this binder for a specials teacher that works with many students. She uses the shiny backgrounds when working with students who only visually attend to shiny things. I included a black background and a few others. I added the Velcro dots to the outside of the binder so that the backgrounds can easily slide into the binder.


Thursday, April 25, 2013
Patriotic Art

Preparation for the activity (This can be done with the students if you have enough time):
Use painters tape to make random lines on the canvas or poster board. (Canvas works better than poster board when you remove the tape and stickers)
Add some star shaped stickers. ( I made the stickers a little less sticky by sticking them to a fuzzy piece of material first.)
Activity:
My students used sponge brushes to paint on the red and blue paint. Their job was to completely cover the white. I added glitter to the paint for a little sparkle.
After the activity:
Let the paint dry completely, then carefully remove the tape and the stickers.
Subscribe to:
Posts (Atom)